Tag Archives: potato

Gardening chores for February

What to focus on, as your gardening chores for February:

apple_pruning1. Still ensure that all your tender plants are securely protected by fleece.

2. If not already done, its your last chance to prune the dormant shrubs and trees that require a good shaping up. Any Winter flowering shrubs must be pruned after they have finished flowering. Take care not to cut the Spring flowering shrubs back otherwise you may miss the show this year.

3. Any bareroot plants such as roses and trees can be planted, as long as the soil is not frozen or waterlogged. This gets them off to the best start in Spring.

4. Net your fruit and vegetables to keep the birds away.

5. Plant onion, shallots and garlic towards the end of this month.

6. Late flowering clematis can be cut back to the lowest and strongest buds followed by a good mulch and feed.

7. The ornamental grasses that have been left over Winter, can now be cut back, as you would have noticed the new shoots emerging.Lawn_care_moss_and_thatch

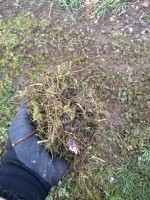
8. Mowing may be necessary if the weather is mild, but do not mow if the conditions are very wet as you may damage the lawn.

9. A lighter form of lawn scarification can be done with a leaf rake to begin clearing the remaining moss for preparation of overseeding your bare patches.

10. Chit your potato tubers in preparation for planting.

Happy Gardening!

Easy potatoes – give it a try…

If there is one thing any garden enthusiast should have a go at, it should be growing some potatoes. They are easy to grow and can be grown in open soil, containers and even Ikea bags! If you have very limited space then growing them in some sort of container is ideal for you. You may not get huge amounts planted but with an average of about 8-10 potatoes per seed potato, even just 5 seed potatoes should yield a crop around 40 potatoes! That should keep you going for a while!
Digging over

If growing them in open soil, then soil preparation should be underway at this time of the year. A good digging over with a well rotted manure prior to planting will ensure there is all the nutritional value in the soil for the best start to the growing season. Take care not to add too much manure as the soil may become too rich then. At this stage of the game you could have taken a trip down to your local Garden Centre to make a choice of which seed potatoes you may be interested in growing. It can be a bit confusing with all the choice and different types, so I hope I can make it easy by describing it as simply as I can:
There are three groups, namely first earlies which take between 8 – 12 weeks to mature; second earlies which take between 12 – 15 weeks to mature and lastly, main crop which can take between 15 – 20 weeks to mature. The choice of potato is governed by the use thereof and if roasting is your main method of cooking, then a potato ideal for roasting would be the best choice for you.

Chitting potatoes Once your choice has been made, then take them home to begin the ‘chitting’ process. It requires looking at which end of each potato has the most eyes (indents) and placing the potatoes in egg cartons with this side facing upwards. This process is not crucial, but does give you a bit of a head start and allows you to pick off weaker shoots so that you get less, but stronger shoots producing a slightly higher yield. Place them in a well lit area away from direct sunlight and wait for the shoots to grow to about an inch.
Once ready for planting, you will need to create trenches approximately 6-8 inches deep in rows, keeping in mind that they are planted about 1ft between potatoes and about 1.5ft between rows.
ImageThe row direction is best running from north to south, if possible, as this ensures the potatoes foliage gets sun from both sides in the row.
Place some organic potato fertilizer at the base of the trench and mix it in well with the soil. You are then ready to place all your seed potatoes in their rows. Once placed, cover them up with the soil so the trenches are filled. Water regularly, but allow them to dry out between waterings.
Once the shoots have emerged from the ground, wait until they are about 4 inches and then ‘earth’ them up by taking the soil around the shoots and pushing it up against the stem to cover it. This is done for two reasons: to increase the yield and also to ensure that the potatoes are deeper beneath the surface and not exposed to sunlight rendering them inedible when turning green.
Potatoes growing No more feeding is required during the growing process, as this has been done prior to planting and at planting stage too.
Once the plants begin to flower, it is the indication that the tubers are beginning to swell and the first potatoes can be lifted once the flowers begin to fade. It is advisable to wait until the foliage begins to turn brown and progressively lift them over time. This is so exciting and the most rewarding part of the growing experience, as the potatoes are like hidden treasure that you have to dig up. Care must be taken not to damage them as you are lifting them. Best practice is to take some plants out and leave the remainder to mature in the soil.
Get the children involved as it is important for them to see where their food come from and they will better appreciate the effort gone into producing the food on their plate.

It’s easy, so give it a try…

Happy gardening!

Gardening chores for June

What to focus on, as your gardening chores for the month of June:

Geraniums1. Keep on top of weeding by regularly hoeing the borders – be careful for flower bulb growth coming through.

2. With the risk of frost coming to an end, your tomato plants can be moved outside. Make sure they are tied in as they grow and pinch out any side shoots to encourage upright growth first.

3. Harvest early potatoes and other early planted crops, such as radishes and lettuces.

4. Mow lawns once a week to for the best quality.

5. Plant out any frost tender annuals such as the Summer bedding as well as the
younger and tender perennials.

6. Ensure that all taller perennials are supported.Tomatoes

7. Prune Spring flowering shrubs and perform the ‘Chelsea chop’ on the early flowering perennials to encourage a second flush of growth and flowers.

8. Treat any mildew infections by spraying with a systemic fungicide or by cutting the plants back to encourage new growth.

9. Cover strawberries and other soft fruit with netting to prevent birds from eating the ripening fruits.

10. Fertilise regularly during the active growing period to ensure optimum results.

Happy gardening!

Easy potatoes

If there is one thing any garden enthusiast should have a go at, it should be growing some potatoes. They are easy to grow and can be grown in open soil, containers and even Ikea bags! If you have very limited space then growing them in some sort of container is ideal for you. You may not get huge amounts planted but with an average of about 8-10 potatoes per seed potato, even just 5 seed potatoes should yield a crop around 40 potatoes! That should keep you going for a while!
Digging over

If growing them in open soil, then soil preparation should be underway at this time of the year. A good digging over with a well rotted manure prior to planting will ensure there is all the nutritional value in the soil for the best start to the growing season. Take care not to add too much manure as the soil may become too rich then. At this stage of the game you could have taken a trip down to your local Garden Centre to make a choice of which seed potatoes you may be interested in growing. It can be a bit confusing with all the choice and different types, so I hope I can make it easy by describing it as simply as I can:
There are three groups, namely first earlies which take between 8 – 12 weeks to mature; second earlies which take between 12 – 15 weeks to mature and lastly, main crop which can take between 15 – 20 weeks to mature. The choice of potato is governed by the use thereof and if roasting is your main method of cooking, then a potato ideal for roasting would be the best choice for you.

Chitting potatoes Once your choice has been made, then take them home to begin the ‘chitting’ process. It requires looking at which end of each potato has the most eyes (indents) and placing the potatoes in egg cartons with this side facing upwards. This process is not crucial, but does give you a bit of a head start and allows you to pick off weaker shoots so that you get less, but stronger shoots producing a slightly higher yield. Place them in a well lit area away from direct sunlight and wait for the shoots to grow to about an inch.
Once ready for planting, you will need to create trenches approximately 6-8 inches deep in rows, keeping in mind that they are planted about 1ft between potatoes and about 1.5ft between rows.
ImageThe row direction is best running from north to south, if possible, as this ensures the potatoes foliage gets sun from both sides in the row.
Place some organic potato fertilizer at the base of the trench and mix it in well with the soil. You are then ready to place all your seed potatoes in their rows. Once placed, cover them up with the soil so the trenches are filled. Water regularly, but allow them to dry out between waterings.
Once the shoots have emerged from the ground, wait until they are about 4 inches and then ‘earth’ them up by taking the soil around the shoots and pushing it up against the stem to cover it. This is done for two reasons: to increase the yield and also to ensure that the potatoes are deeper beneath the surface and not exposed to sunlight rendering them inedible when turning green.
Potatoes growing No more feeding is required during the growing process, as this has been done prior to planting and at planting stage too.
Once the plants begin to flower, it is the indication that the tubers are beginning to swell and the first potatoes can be lifted once the flowers begin to fade. It is advisable to wait until the foliage begins to turn brown and progressively lift them over time. This is so exciting and the most rewarding part of the growing experience, as the potatoes are like hidden treasure that you have to dig up. Care must be taken not to damage them as you are lifting them. Best practice is to take some plants out and leave the remainder to mature in the soil.
Get the children involved as it is important for them to see where their food come from and they will better appreciate the effort gone into producing the food on their plate.

Come on and give it a try…

Happy gardening